Lesson 1 · 1 of 20
Canvas: shapes and text · tkinter
Draw rectangles, ovals, polygons, lines, arcs and text on a tkinter Canvas, and understand its coordinates, item ids and tags.
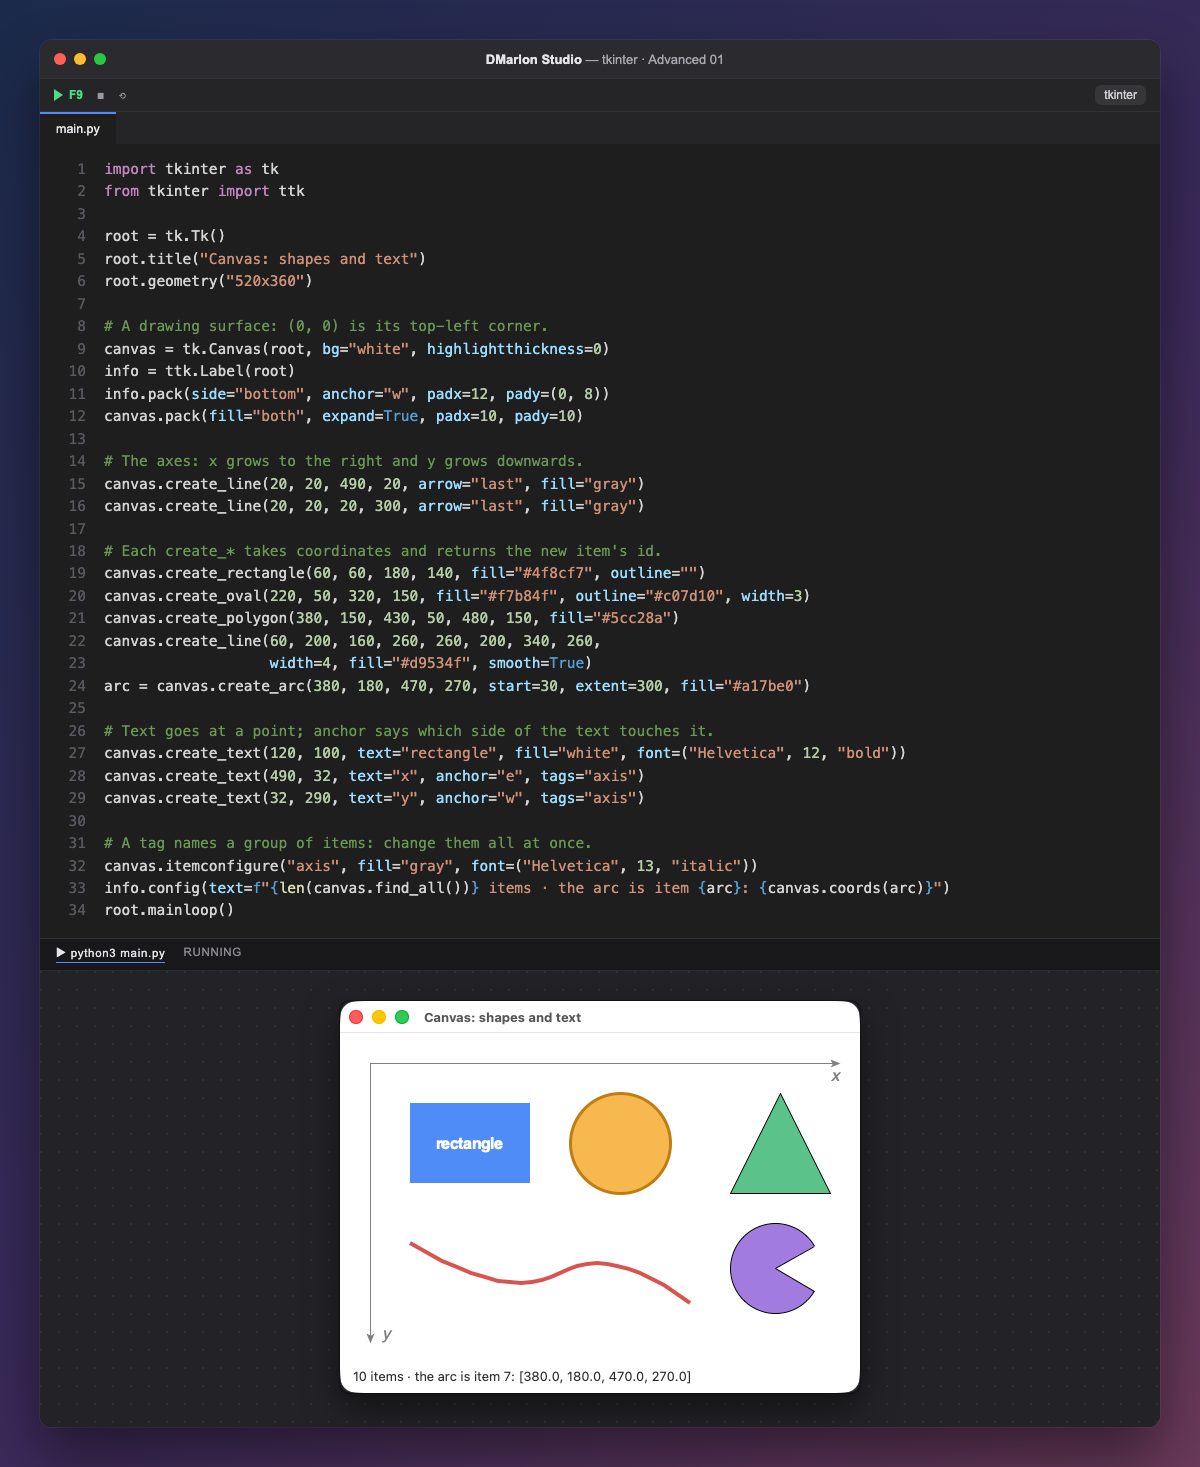
tk.Canvas is a drawing surface. Its coordinates start at the top-left corner, (0, 0): x grows to the right and y grows downwards (the opposite of a school graph). The two grey arrows, drawn with create_line(..., arrow="last"), are there as a reminder.
Each shape is made with a create_* method and its coordinates: create_rectangle and create_oval take the two corners of the box around them; create_polygon, the vertices; create_line, as many points as you like (smooth=True curves it); and create_arc, the oval's box plus start and extent in degrees. fill, outline and width set the fill, the border and its thickness.
create_text places text at a point; anchor says which side of the text touches that point ("e": the right; "w": the left). Every create_* returns the item's numeric id, and coords(id) reads (or changes) its coordinates, as the label at the bottom does with the arc.
Tags group items: the two axis letters have tags="axis", and itemconfigure("axis", ...) changes their colour and font at once. A tag also works with move, delete or tag_bind to move, delete or react to clicks. find_all() returns every id.
In DMarlon Studio the Canvas is in the palette: drag it onto the window and the studio writes the tk.Canvas (without the focus border, highlightthickness=0); the drawing is done in code, as here.
Code · main.py
import tkinter as tkfrom tkinter import ttkroot = tk.Tk()root.title("Canvas: shapes and text")root.geometry("520x360")# A drawing surface: (0, 0) is its top-left corner.canvas = tk.Canvas(root, bg="white", highlightthickness=0)info = ttk.Label(root)info.pack(side="bottom", anchor="w", padx=12, pady=(0, 8))canvas.pack(fill="both", expand=True, padx=10, pady=10)# The axes: x grows to the right and y grows downwards.canvas.create_line(20, 20, 490, 20, arrow="last", fill="gray")canvas.create_line(20, 20, 20, 300, arrow="last", fill="gray")# Each create_* takes coordinates and returns the new item's id.canvas.create_rectangle(60, 60, 180, 140, fill="#4f8cf7", outline="")canvas.create_oval(220, 50, 320, 150, fill="#f7b84f", outline="#c07d10", width=3)canvas.create_polygon(380, 150, 430, 50, 480, 150, fill="#5cc28a")canvas.create_line(60, 200, 160, 260, 260, 200, 340, 260, width=4, fill="#d9534f", smooth=True)arc = canvas.create_arc(380, 180, 470, 270, start=30, extent=300, fill="#a17be0")# Text goes at a point; anchor says which side of the text touches it.canvas.create_text(120, 100, text="rectangle", fill="white", font=("Helvetica", 12, "bold"))canvas.create_text(490, 32, text="x", anchor="e", tags="axis")canvas.create_text(32, 290, text="y", anchor="w", tags="axis")# A tag names a group of items: change them all at once.canvas.itemconfigure("axis", fill="gray", font=("Helvetica", 13, "italic"))info.config(text=f"{len(canvas.find_all())} items · the arc is item {arc}: {canvas.coords(arc)}")root.mainloop()Key points
(0, 0)is the top-left corner and y grows downwards.- Every
create_*returns the item's id. fill,outlineandwidthset fill, border and thickness.- A tag groups items so you can change them all at once.
Exercise
Write your name with create_text at (260, 300) and give it the tag "axis": it takes the colour and font of the axis letters.