Lesson 14 · 14 of 20
Layout with pack · tkinter
tkinter's pack manager: side, fill and expand to build a header, a toolbar, side panels and a central area that grows.
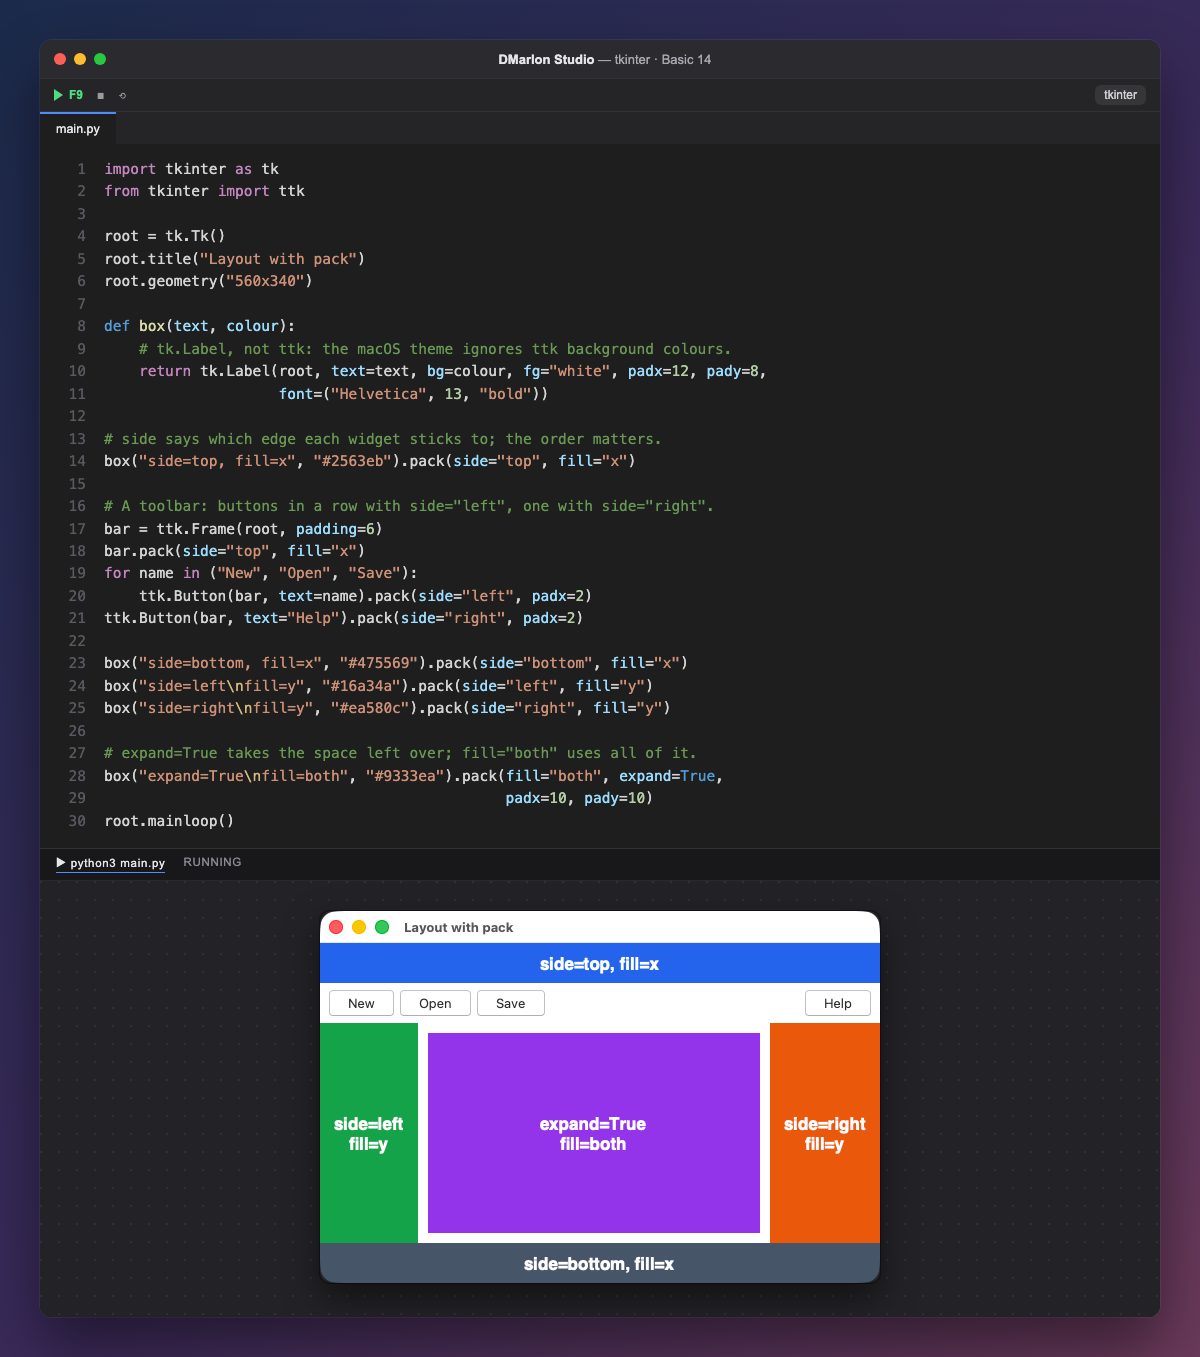
`pack` places each widget against one side of the space that is still free. `side` says which: "top" (the default), "bottom", "left" or "right". Order matters: each widget takes its strip and leaves the rest for the next one.
`fill` stretches the widget inside its strip: "x" across, "y" down and "both" in both directions. The blue header and the grey footer use fill="x"; the side panels, fill="y".
`expand=True` gives the widget the space left over. The purple box is packed last, with expand=True and fill="both": it takes everything that remains and grows when the window gets bigger. padx and pady leave a margin around it.
The toolbar is a ttk.Frame with three buttons in a row (side="left") and Help at the far end (side="right"). Inside each frame, pack starts from scratch.
box creates the coloured labels with tk.Label, because the macOS theme does not paint the background of ttk ones. The DMarlon Studio designer places each widget exactly where you drop it (with place); you can use pack by hand in the Code tab.
Code · main.py
import tkinter as tkfrom tkinter import ttkroot = tk.Tk()root.title("Layout with pack")root.geometry("560x340")def box(text, colour): # tk.Label, not ttk: the macOS theme ignores ttk background colours. return tk.Label(root, text=text, bg=colour, fg="white", padx=12, pady=8, font=("Helvetica", 13, "bold"))# side says which edge each widget sticks to; the order matters.box("side=top, fill=x", "#2563eb").pack(side="top", fill="x")# A toolbar: buttons in a row with side="left", one with side="right".bar = ttk.Frame(root, padding=6)bar.pack(side="top", fill="x")for name in ("New", "Open", "Save"): ttk.Button(bar, text=name).pack(side="left", padx=2)ttk.Button(bar, text="Help").pack(side="right", padx=2)box("side=bottom, fill=x", "#475569").pack(side="bottom", fill="x")box("side=left\nfill=y", "#16a34a").pack(side="left", fill="y")box("side=right\nfill=y", "#ea580c").pack(side="right", fill="y")# expand=True takes the space left over; fill="both" uses all of it.box("expand=True\nfill=both", "#9333ea").pack(fill="both", expand=True, padx=10, pady=10)root.mainloop()Key points
sidepicks the edge; the order ofpackdecides who gets each strip.fillstretches the widget:"x","y"or"both".expand=Trueshares out the leftover space.- Each frame has its own
packinside.
Exercise
Move the green side panel's line so it runs before the grey footer's and see how the window is shared out differently.